
Why do we use micropipettes?
Micropipettes are essential tools for accurately measuring and transferring small volumes of liquids during molecular testing. This guide will provide tips for correctly using a micropipette.
Selecting the right micropipette
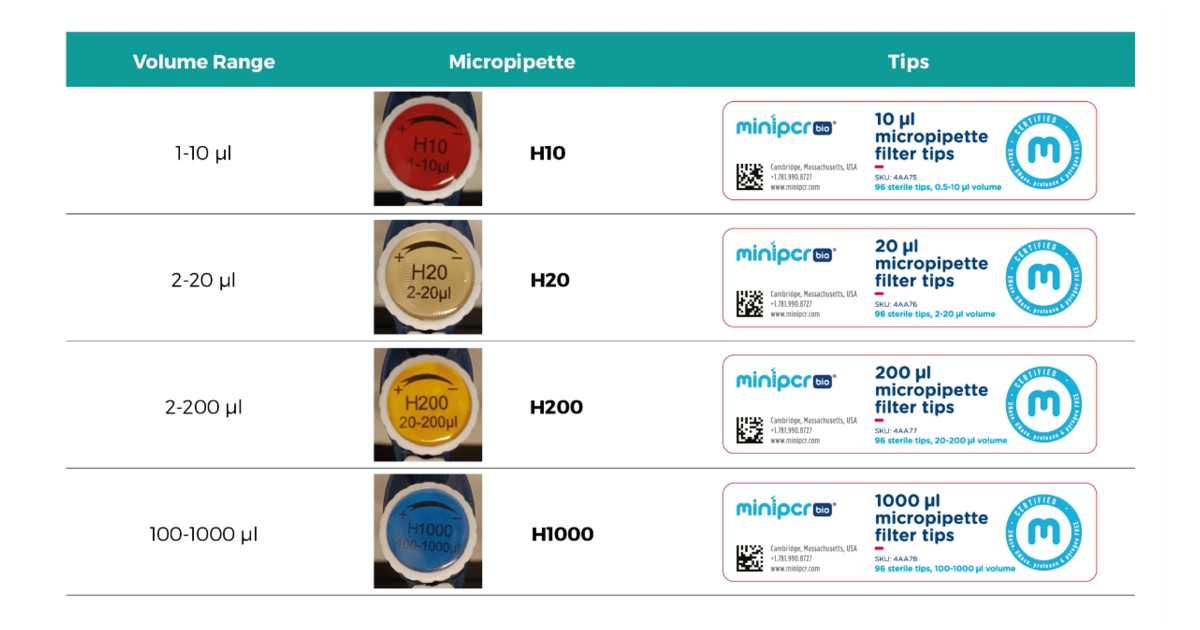
Micropipettes are available in volume ranges defined in microliters (one millionth of a liter). The most commonly used volume ranges are:
- 1 µL – 10 µL (e.g., H10)
- 2 µL – 20 µL (e.g., H20)
- 20 µL – 200 µL (e.g., H200)
- 100 µL – 1000 µL (e.g., H1000)
The first step in micropipetting is always to choose the appropriate micropipette for the volume that you need to handle, and setting the volume dial to that volume.
Micropipette tips
You never pipette liquids directly into the micropipette, as this would damage the pipette. Instead, you use a new pipette tip every time you pipette a new liquid. The liquid should always be held in the tip without touching the micropipette, to avoid potential contamination or damage. For example, you shouldn’t turn the pipette upside down with liquid in the tip or put your pipette in a volume of liquid that goes above the top of the tip.
To ensure accurate and reliable volume measurement, it is crucial to select the correct tip size for each micropipette to ensure a proper seal and prevent leakage or variation in the delivered volume.
We recommend the use of filtered tips to prevent contamination; the filter works as a barrier that prevents aerosols and contaminants from entering into the micropipette.
How to handle and use a micropipette
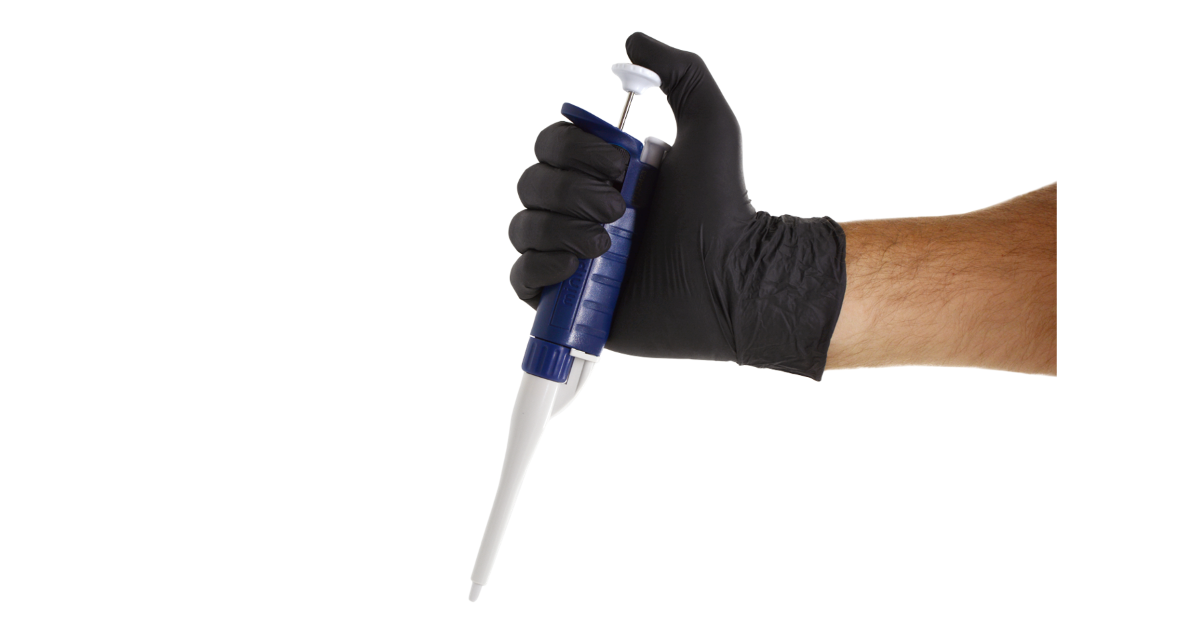
- Hold the micropipette near the top, just above the volume adjustment dial, with a relaxed grip. Avoid touching the shaft or tip to prevent contamination. The ejector button will rest in the crook of your thumb with the plunger button resting on your index finger.
- Use the volume adjustment dial to align the indicator with the desired volume mark. Avoid over turning this dial past the lowest/highest volumes for this pipette.
- Press the shaft down firmly onto a new tip. Make sure that the tip is holding tightly to the micropipette.
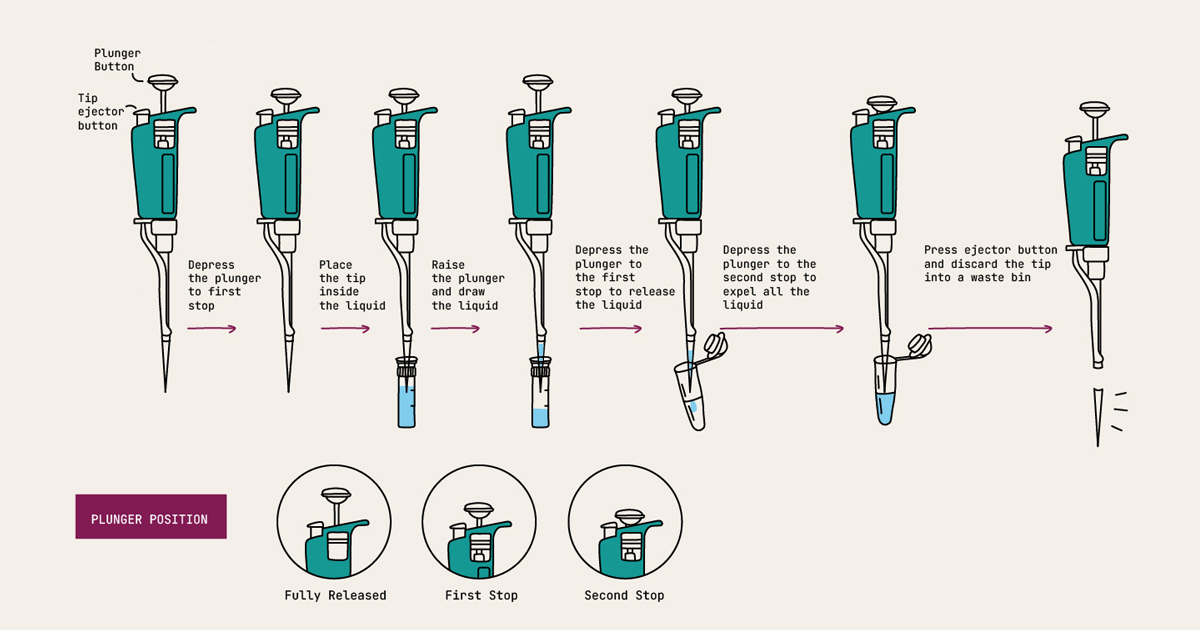
- To aspirate (draw up) a liquid, first depress the plunger till the first stop, which is the first point of resistance that you will feel. While holding the plunger at the first stop, submerge the tip into the liquid, and gradually release the plunger to draw up the desired volume. Make sure you do not remove the tip from the liquid before you completely release the plunger. Check that you aspirated liquid and there are no bubbles. Note, for more accurate volume transfer, minimally immerse the tip into the solution and always hold the micropipette vertically.
- To dispense the liquid, position the tip in the receiving tube. First, gently press the plunger to the first stop, then fully depress the plunger (second stop) to deliver the liquid. Make sure you pipette on the side wall of the tube or into another liquid to avoid small droplets sticking to the micropipette tip.
- If you need to mix two solutions, submerge the tip into the solution, gently and slowly pipette up-down using only the first stop, making sure to not introduce bubbles.
- Eject the disposable tip in a dedicated waste bin by pressing the ejector. Make sure you change tips between samples and reagents. If you are not sure if you accidentally touched surfaces or liquids with the tip, change the tip before immersing it into the liquid. This will prevent contamination.
Maintaining a micropipette
- Regularly calibrate the micropipettes to ensure accurate and precise pipetting.
- Regularly clean the external surfaces.
- Keep the micropipettes vertical using a stand to prevent contamination.
- Always handle micropipettes with care and avoid exposure to extreme temperatures.
Pipetting practice makes perfect
Before running your own molecular tests, make sure you master the micro pipetting technique. We recommend:
- Get familiar with the dials for adjusting the volumes.
- Get familiar with the first and second stop.
- Practice inserting the tip and ejecting it.
- Practice aspirating and dispensing liquid using water or colored dyes. To check micro pipetting accuracy, try to dispense the same volume in different PCR tubes. Then, check that the level of the liquid is comparable in each tube. Practice using different pipettes and different volumes.
Here are a number of resources you can use to become a micropipetting pro.